By the ClearFix Tech Editorial Desk · Updated August 29, 2026
This guide independently synthesizes Microsoft’s official BitLocker documentation into a safety-first decision path. The three diagrams are original and contain no real recovery keys or personal identifiers.
If Windows asks for a BitLocker recovery key after an update, do not reset the PC or erase the drive. First write down the Recovery Key ID shown on the blue screen, then use another device to find the matching 48-digit key in the Microsoft account, work or school account, printout, or USB drive where it was backed up. The Key ID is not the recovery key—it only tells you which saved key to use.
Quick answer: use the Key ID to find the right key
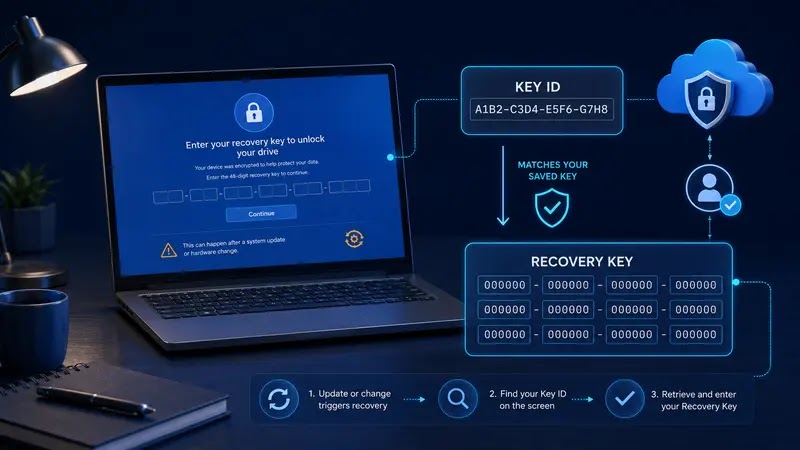
BitLocker is Windows drive encryption. It can request recovery when it detects a change that it cannot confidently verify, including certain hardware, firmware, boot, security, or software changes. Microsoft describes the recovery key as a unique 48-digit number. Without the matching key, neither Microsoft Support nor a repair shop can recreate it for you.
Before doing anything else:
- Keep the recovery screen open.
- Photograph or carefully copy the Recovery Key ID. Do not publish the screen online if it contains identifying information.
- On a phone or another computer, sign in to the account that was used when the PC was set up.
- Compare the Key ID on the screen with the IDs beside your stored recovery keys.
- Enter only the matching 48-digit key.
If the key works, Windows should continue booting. After you regain access, back up the key again and investigate what changed before the recovery prompt appeared.
Where to look for the BitLocker recovery key
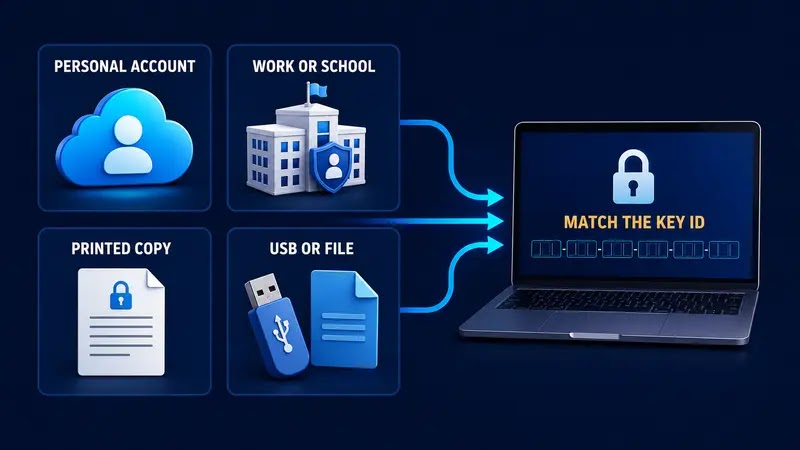
The correct location depends on who set up the PC and who enabled encryption.
| PC setup | Most likely key location | What to check |
|---|---|---|
| Personal PC signed in with a Microsoft account | Microsoft account recovery-key page | Sign in with the same account used on the locked PC and match the Key ID |
| Work or school device | Organization account or IT management system | Sign in to the work/school account or contact the IT administrator |
| Someone else configured the computer | That person’s Microsoft account | Ask the person who first enabled encryption or completed setup |
| Key saved manually | Printed page, text file, or USB drive | Search for “BitLocker Recovery Key” and match the Key ID |
| Managed company computer | Entra ID or Active Directory | Contact the organization’s help desk; do not reset company equipment yourself |
Microsoft’s official Find your BitLocker recovery key guide explains these locations. If you find several keys, do not guess. Match the ID displayed on the recovery screen.
If the Microsoft account shows no matching key
First confirm that you signed in with the correct account. Many people have separate personal, work, and school accounts. A PC purchased or configured by a family member may have stored its key in that person’s account instead.
Check these possibilities in order:
- Try every Microsoft account that has been used to set up or administer the computer.
- Check whether the device belongs to an employer, school, or previous owner.
- Look for a printed recovery-key page, a saved text file, or a USB drive.
- Ask the person or business that originally configured Windows.
- On a managed device, contact IT and provide the Recovery Key ID—not your password.
Do not pay a website that claims it can calculate or bypass a missing recovery key. Strong drive encryption is specifically designed to prevent access without the key. Microsoft states that Support cannot retrieve, provide, or recreate a lost key.
What not to do on the recovery screen
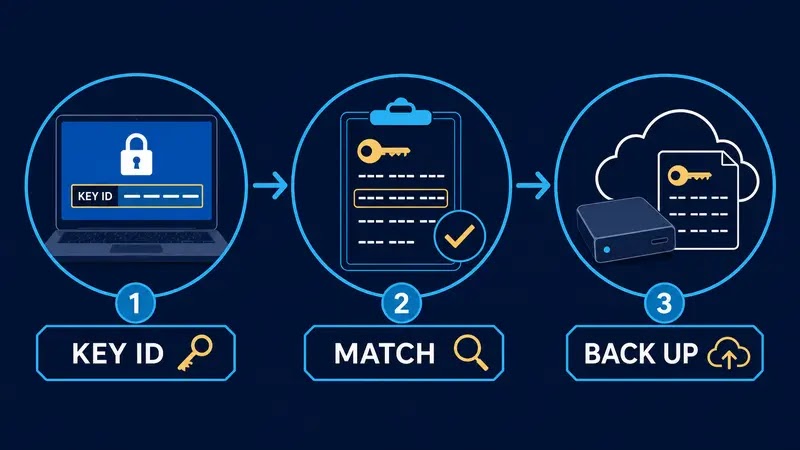
Avoid actions that can turn a recoverable interruption into permanent data loss.
- Do not choose a reset or clean installation merely to get past the screen.
- Do not clear the TPM, change Secure Boot settings, or repeatedly modify BIOS settings without understanding the original configuration.
- Do not disable encryption by following an unverified command copied from a forum.
- Do not post the 48-digit recovery key, complete Key ID, device serial number, or account details publicly.
- Do not assume a Windows password, PIN, or product key can replace the BitLocker recovery key. They serve different purposes.
If the data is important and no matching key can be located, stop before any destructive recovery option. A professional can help evaluate backups and hardware condition, but cannot decrypt a healthy BitLocker drive without the recovery key.
Why an update can be followed by BitLocker recovery
The timing does not always mean the update damaged the drive. BitLocker checks the trusted boot environment. A firmware, hardware, security-policy, boot-manager, or TPM-related change can cause Windows to request proof that the person starting the computer is authorized.
Microsoft’s BitLocker overview explains that a hardware change or suspected unauthorized access can trigger recovery. Entering the valid key confirms access without removing the drive’s encryption protection.
After Windows starts, check Windows Update history and the computer manufacturer’s firmware or BIOS history. On a work device, let IT examine the event. Avoid making several firmware and security changes at once because that makes the cause harder to isolate.
Back up the key after access is restored
Once the computer is usable again, create at least two secure recovery-key copies in different locations. Microsoft’s Back up your BitLocker recovery key instructions cover saving the key to a Microsoft account, USB drive, file, or printout when those options are available.
A sensible recovery routine is:
- Verify that the saved key opens the correct drive.
- Confirm which account or administrator controls the device.
- Store one recovery copy separately from the computer.
- Label the backup with the device name and date, but do not expose the full key in an insecure note.
- Before future BIOS, TPM, motherboard, or boot-policy changes, confirm that the recovery key is available.
For an organization-owned computer, follow the company’s key-escrow policy rather than storing corporate recovery information in a personal account.
Bottom line
A BitLocker recovery screen after a Windows update is not a signal to erase the computer. Record the Key ID, locate the matching 48-digit recovery key in the correct account or backup, and enter it once. If no matching key exists, stop before resetting the PC. After recovery, back up the key securely and review recent firmware, hardware, and security changes so the next prompt does not become another emergency.
Updated: August 28, 2026